
|
|

|
|
|
|
Welcome to the Australian Ford Forums forum. You are currently viewing our boards as a guest which gives you limited access to view most discussions and inserts advertising. By joining our free community you will have access to post topics, communicate privately with other members, respond to polls, upload content and access many other special features without post based advertising banners. Registration is simple and absolutely free so please, join our community today! If you have any problems with the registration process or your account login, please contact us. Please Note: All new registrations go through a manual approval queue to keep spammers out. This is checked twice each day so there will be a delay before your registration is activated. |
|
|||||||
| The Bar For non Automotive Related Chat |
 |
|
|
Thread Tools | Display Modes |
 19-01-2023, 05:08 PM
|
#1 | ||
|
DIY Tragic

Join Date: Apr 2018
Location: Sydney, more than not. I hate it.
Posts: 20,899

|
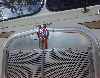
This motor, its in-chassis and clearance above is not great, particularly towards the back.
The four small holes down the centreline are our problem. Theyre supposed to be about 65-70mm deep with an M6 thread, thats torqued to 7Nm+90°+90°. Three of the four holes are compromised. Broken off M6 bolts jammed in the bottom, and have been Helicoiled to M8 above this. Two of these have stripped their Helicoils. Theres prevailing opinion that the long M6 bolts can be replaced by shorter M8 bolts at 25Nm (not angular torqued). So the M8 in itself isnt a problem. Common sense suggests unifying the fasteners, so thats one drill/tap, probably three extractions and insert type repairs. What Im thinking is, make a drill jig. Starting with a length of 20mm 6061 flat bar, cut to fit just between the cam bearing blocks, and a couple of turned bosses screwed to its underside, that locate snugly in the larger holes of the centreline. Then use drill bushes, to locate the small hole centres accurately. A small bore bush (3/16) to extract the broken ends, and a larger bush for whatever insert is recommended. Both would have to be used with a right angle drill. I guess the questions are: Is there a standardisation of drill bushing OD and length within certain size ranges, and is it too ambitious to try this in-chassis with depths approaching 70mm on the smallest drill, noting the right angle head? |
||

|

|
|
19-01-2023, 05:12 PM
|
#2 | |||
|
Cabover nut
Join Date: Aug 2015
Location: Onsite Eastcoast
Posts: 10,624
|
Quote:
__________________
heritagestonemason.com/Fordlouisvillerestoration In order that the labour of centuries past may not be in vain during the centuries to come...... D. Diderot 1752
|
|||
|
|
|
| 2 users like this post: |
|
19-01-2023, 05:15 PM
|
#3 | ||
|
DIY Tragic
Join Date: Apr 2018
Location: Sydney, more than not. I hate it.
Posts: 20,899
|
I think it’s what they did! Now we do it again.
We did workshop some redneck options, had a laugh and decided to pursue a more professional approach. |
||
|
|
|
| This user likes this post: |
|
19-01-2023, 05:25 PM
|
#4 | |||
|
Cabover nut
Join Date: Aug 2015
Location: Onsite Eastcoast
Posts: 10,624
|
Quote:
Did the redneck option include the Supaglue and bi carb method.
__________________
heritagestonemason.com/Fordlouisvillerestoration In order that the labour of centuries past may not be in vain during the centuries to come...... D. Diderot 1752
|
|||
|
|
|
| This user likes this post: |
|
19-01-2023, 05:31 PM
|
#5 | ||
|
DIY Tragic
Join Date: Apr 2018
Location: Sydney, more than not. I hate it.
Posts: 20,899
|
7Nm+90°+90° (angular torquing)
Its actually pretty close to shearing the bolt IMO. We considered using the cam cover as a girdle to bolt straps of angle iron across the injector yokes with a tensioning pusher bolt Thats got to be redneck enough. No bicarb and cyano for this one. |
||
|
|
|
| This user likes this post: |
|
19-01-2023, 06:15 PM
|
#6 | |||
|
Regular Member
Join Date: Dec 2022
Location: Frankston
Posts: 100
|
Quote:
__________________
Cheers |
|||
|
|
|
|
19-01-2023, 07:29 PM
|
#7 | |||
|
FF.Com.Au Hardcore

Join Date: Mar 2012
Posts: 4,763
|
Quote:
Never really got this. Torque setting plus 2 turns...why not just reference a larger torque number? The 2 turns would always give a range of results due to each bolt being slightly different. What am I missing? (Sorry, this is no help to the problem, but a good moment to ask the question) |
|||
|
|
|
| This user likes this post: |
|
19-01-2023, 07:42 PM
|
#8 | ||
|
FF.Com.Au Hardcore
Join Date: May 2006
Posts: 1,492
|
Over the years I have come to the realisation that what seems the longer and harder way is always the easiest with best outcome.
Therefore, these days I would take the head off and if I didn't have the gear to fix properly, I'd take it somewhere that could. This may be more expensive, but if you put 50 to 100$ an hour on your life, you might find it's cheaper and better. |
||
|
|
|
| 5 users like this post: |
|
19-01-2023, 08:09 PM
|
#9 | |||
|
Regular Member
Join Date: Dec 2022
Location: Frankston
Posts: 100
|
Quote:
__________________
Cheers |
|||
|
|
|
|
19-01-2023, 08:22 PM
|
#10 | ||
|
DIY Tragic
Join Date: Apr 2018
Location: Sydney, more than not. I hate it.
Posts: 20,899
|
If the head comes off, it introduces liability for the resealing.
Id more likely drop the whole motor if reliably square access from above starts to look impossible. That would also allow the cam box to be set aside more easily for better jig-work. The shop probably doesnt have a chain breaker to suit, but everything else would be regular fare. The whole situation has come about first by poor design and secondly poor thread preparation prior the last repair - its known these motors have issues with the injector bolts and chasing their holes fully clean is essential. Plus new bolts every time. |
||
|
|
|
| This user likes this post: |
|
19-01-2023, 08:30 PM
|
#11 | ||
|
FF.Com.Au Hardcore
Join Date: Feb 2008
Location: Geelong, Victoria
Posts: 4,338

|
Why did they use helicoils and not just tap a 8 mm thread into the alloy? Now the helicoil holes are close to 10mm? Is there enough room to tap a whole new (and deep) 6mm thread to the side or front?
Last edited by AMB; 19-01-2023 at 08:42 PM. |
||
|
|
|
| 2 users like this post: |
|
19-01-2023, 08:35 PM
|
#12 | |||
|
FF.Com.Au Hardcore
Join Date: Feb 2008
Location: Geelong, Victoria
Posts: 4,338
|
Quote:
Last edited by AMB; 19-01-2023 at 08:47 PM. |
|||
|
|
|
|
19-01-2023, 08:47 PM
|
#13 | |||
|
FF.Com.Au Hardcore
Join Date: Mar 2012
Posts: 4,763
|
Quote:
2 quarter turns would be different for each after hitting the 7Nm. Maybe for another thread...dont want to hijack. |
|||
|
|
|
|
19-01-2023, 09:01 PM
|
#14 | ||
|
FF.Com.Au Hardcore
Join Date: Jun 2009
Posts: 18,982
|
|
||
|
|
|
| 3 users like this post: |
|
19-01-2023, 09:11 PM
|
#15 | |||
|
DIY Tragic
Join Date: Apr 2018
Location: Sydney, more than not. I hate it.
Posts: 20,899
|
Not ready to scrap it yet!
 Quote:
One reason to split your angular torque into stages is to allow for settling or equalisation of the clamping forces across a part. Just like regular torquing in stages. These motors, the second 90° was an ECN/TSB due to frequent injector seal failures early in the motors life. A lot of people feel its a bit too much extra and seem to have their preferred stop points of less than 90. Last edited by Citroënbender; 19-01-2023 at 09:19 PM. |
|||
|
|
|
| This user likes this post: |
|
19-01-2023, 09:33 PM
|
#16 | |||
|
FF.Com.Au Hardcore
Join Date: Feb 2008
Location: Geelong, Victoria
Posts: 4,338
|
Quote:
|
|||
|
|
|
| This user likes this post: |
|
19-01-2023, 10:55 PM
|
#17 | ||
|
FF.Com.Au Hardcore

Join Date: Apr 2008
Posts: 5,336

|
Hi. Is there enough room for a keensert or time-sert solid type repair inset. You would need to get the broken bits of 6mm bolt out of the bottom of the hole but I think the outer thread for a 6mm dia insert is around 10mm. http://www.timesert.com/html/mtrcsert.html . Cheers MD
PS They also do a big sert for repairing hole that have stripped helicoils in them. http://timesert.com/catalog/BIG-SERT_2017-Oct.pdf .
__________________
 HI  I'M MICHAEL  2003 ACID RUSH BA FUTURA WAGON  light up window switches | auto on cruise control | doubleclick window lift from remote Last edited by foxtrot3; 19-01-2023 at 11:13 PM. |
||
|
|
|
|
19-01-2023, 11:31 PM
|
#18 | ||
|
FF.Com.Au Hardcore
Join Date: Apr 2008
Posts: 5,336
|
Hi. And an aussie supplier http://crosstools.com.au/time-sert-t...ternative.html . Cheers MD
__________________
HI I'M MICHAEL 2003 ACID RUSH BA FUTURA WAGON light up window switches | auto on cruise control | doubleclick window lift from remote |
||
|
|
|
| This user likes this post: |
|
20-01-2023, 12:04 AM
|
#19 | ||
|
DIY Tragic
Join Date: Apr 2018
Location: Sydney, more than not. I hate it.
Posts: 20,899
|
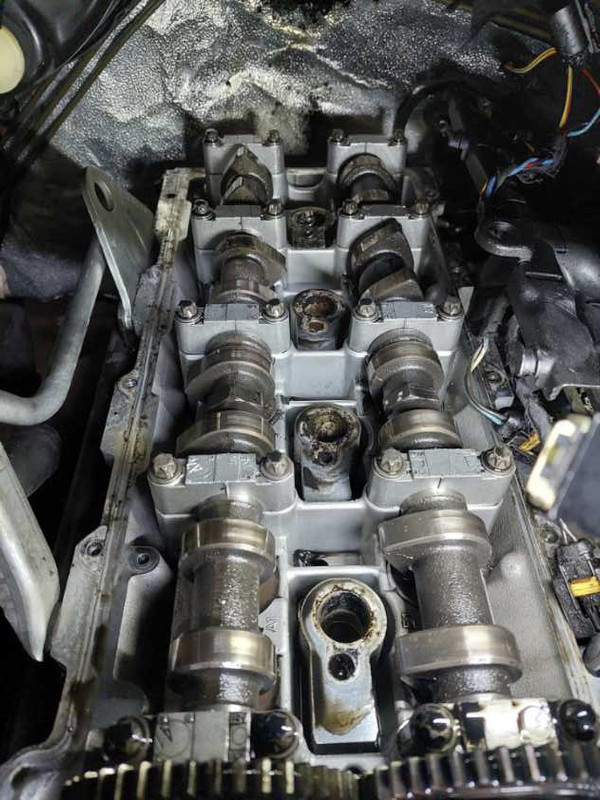
Hi Michael,
Our (the workshop) concern about restoring the M6 with inserts is how close it might come to the combustion chamber and related weakening of the head metal between the injector hole, valve seats and thread repair insert. The heads dont have a prechamber, the piston is shaped instead. So no worries about a press fit chamber coming loose. Depth is an issue in terms of retaining accuracy, I think its why the prevailing workaround is a shorter M8 bolt, although we still have thread issues with this - plus broken material to get out. Finding a way to plunge the drill accurately and squarely is the big challenge. It doesnt seem any easier to get long drill bushings now, than when I had some made 25 years ago - I thought global supply lines mightve improved. Height of the threaded bosses is better shown here, not the exact head but same family and character: |
||
|
|
|
|
20-01-2023, 12:18 AM
|
#20 | ||
|
Guest
Join Date: Aug 2018
Posts: 1,892
|
If You're intent on repairing that Head? You need to remove It.. In my Opinion.
How much is a S/H one.? |
||
|
|
|
| 2 users like this post: |
|
20-01-2023, 12:24 AM
|
#21 | ||
|
DIY Tragic
Join Date: Apr 2018
Location: Sydney, more than not. I hate it.
Posts: 20,899
|
Probably $1K, not much less than a bare Chinese new one. Either will then need $400 in a gasket and bolt kit, plus I don’t know if you can just replace the breaking link in the timing chain. But as I said earlier, reluctant to take on the extra liability that comes with opening a motor.
Edit: Cheapest used head is about $600 airfreighted from Europe. Last edited by Citroënbender; 20-01-2023 at 12:35 AM. |
||
|
|
|
|
20-01-2023, 07:16 PM
|
#22 | ||
|
FF.Com.Au Hardcore
Join Date: May 2006
Posts: 1,492
|
That pedestal is big. Can you make a new retainer and drill new holes further back?
|
||
|
|
|
| 2 users like this post: |
|
22-01-2023, 10:58 AM
|
#23 | ||
|
DIY Tragic
Join Date: Apr 2018
Location: Sydney, more than not. I hate it.
Posts: 20,899
|
The retainer yoke pivots on a ball profile cast into the cam cover, unfortunately that pretty much excludes the possibility of something like you suggest.
A saving grace in the whole issue is that very slight misalignment is unlikely to be a problem, because of how the yoke pivots on the ball profile. Car is now in a shop parking bay and owner isnt pushing us, so if it takes a fortnight to resolve economically thats not a headache. Also we havent had to even crack the cooling system with this approach, only fluids drained are from the diesel filter forwards. |
||
|
|
|
|
22-01-2023, 12:12 PM
|
#24 | ||
|
praek tih kl jo kr

Join Date: Mar 2011
Location: Atwell W.A.
Posts: 1,551
|
Sorry no quick fix from me, but its a poor design, you would think they would use a stud with a nut instead to stop this happening in the softer aluminium.
Might be the modification you can do to stop it happening again in the future? |
||
|
|
|
| 3 users like this post: |
|
22-01-2023, 12:39 PM
|
#25 | ||
|
DIY Tragic
Join Date: Apr 2018
Location: Sydney, more than not. I hate it.
Posts: 20,899
|
I reckon it was probably designed as a last-chance fusible element. So excessive combustion chamber pressure would further slightly stretch the bolt and allow the seal to blow.
If the bolt were replaced with a stud, youd have to fit the injector and yoke as a pair - not one, then the other. Cant see any further issues, though. |
||
|
|
|
|
22-01-2023, 12:56 PM
|
#26 | |||
|
FF.Com.Au Hardcore
Join Date: Jul 2012
Posts: 3,851
|
Quote:
|
|||
|
|
|
| 2 users like this post: |
|
22-01-2023, 03:56 PM
|
#27 | |||
|
DIY Tragic
Join Date: Apr 2018
Location: Sydney, more than not. I hate it.
Posts: 20,899
|
Quote:
Theres a budget for repair, its just that everything we open up assumes a level of risk and liability - whether the cooling system, AC, head/block interface. Im going to take some more measurements this afternoon and sketch my jig idea. |
|||
|
|
|
|
22-01-2023, 04:05 PM
|
#28 | ||
|
FF.Com.Au Hardcore
Join Date: Jul 2005
Posts: 552
|
he proper way to do it is to remove the head. Usually the most expensive up front costs are the cheapest long term costs..
Particularly given the "concern about restoring the M6 with inserts is how close it might come to the combustion chamber and related weakening of the head metal between the injector hole, valve seats and thread repair insert" But to answer your question, yes standard (hardened) drill (slip) bushes exist.. however If you must proceed in-situ drill and tap/thread repair, and you have access to a lathe, take a short standard fastener (M6 ? M8 ?) from the hole to be repaired, and drill a fastener thru hole, say 1/8" or 3mm. insert this as a drill guide to get a decent centre. (broken bolts tend to not be smooth and the centre of the drill wanders.) Use rod if stripped of correct diameter For M6, 1/8 or 3mm is a small diameter, and may only get 70mm from a long series drill. Use a low grade fastener (Grade 4) for the guide -don't use a 8.8-12.9 Socket head cap screw... I'd be marking the depth on the drill too, Hate to make it a through hole... if available use a LH flute drill and hammer function, you may get the drill itself loosen/remove the broken fastener, without needing the screw extractors (may save a step), but will likely depend on whether broken bolt has bottomed out. Oh, and Use a very sticky grease, the swarf / chips produced may kill the engine if not 100% removed, (or alternatively bottom the new fastener resulting in the soft aluminium thread stripping out) also worth noting that M8 at 25Nm is likely well over 1000Kg of clamp force depending on fastener and lubrication, and could be as high as 1900 Kg f... Last edited by 383hq; 22-01-2023 at 04:14 PM. |
||
|
|
|
| 5 users like this post: |
|
01-03-2023, 11:21 AM
|
#29 | ||
|
DIY Tragic
Join Date: Apr 2018
Location: Sydney, more than not. I hate it.
Posts: 20,899
|
After a spell off (cf the Cortisone Injections thread) tomorrow is the day for a crack.
Ill update with results; well try in-situ first, failing that try tilting the driveline forward and down for a better shot, worst case the motor and subframe come out and we attack it directly. |
||
|
|
|
|
01-03-2023, 02:20 PM
|
#30 | ||
|
FF.Com.Au Hardcore

Join Date: Jan 2005
Posts: 1,522
|
I did similar repair to a Amarok recently, which my mate had butchered the holes (all out of round) trying to drill out the Brocken 6mm bolts. After the Brocken bolts and a piece of Brocken tap were out, (suggested about then he sticks to concrete form work) filled the holes with jb weld flush then used caps to mark hole centres, drilled small piles holes to depth, then increased hole size gradually till it was suitable to tap 3/8 unc, used unc which has nice course thread for alloy.
then cut some old bolts to length, drilled 6mm holes down centre in the lathe, then some locktite, and wound then in flush and was good to go. |
||
|
|
|
| 5 users like this post: |


 Linear Mode
