
|
|

|
|
|
 28-05-2007, 03:18 PM
|
#1 | |||
|
Back to Le Frenchy

Join Date: Feb 2005
Location: Back home.....
Posts: 13,346
|
I've done a search and had a read but for the life of me I still can't figure it out. I've removed the rubber grommet from the rear disc and I've found what looks like it is an adjuster, the inspection hole is at 3 o'clock on the pass side / 9 o'clock on the drivers when I can see the adjuster. Now which way do I turn it? I reckon I could almost get a small flat blade screwdriver in there but I just need to know whether I turn the screw clockwise or anti clockwise on each wheel.
__________________
Quote:
07 Renault Sport Megane F1 Team R26 #1397
|
|||

|

|
|
28-05-2007, 05:11 PM
|
#2 | ||
|
Miami Pilot
 
Join Date: Jan 2005
Location: ACT
Posts: 21,703

|
Turning it clockwise lengthens the adjuster. It's hard to do though. Easiest way is to follow the steps below. BUT, before you start, back off the 10mm adjusting nut at the handbrake lever inside the car, until it's all the way to the top of the threaded rod. This will enable you to do some adjustment from within the car once the handbrake starts to loosen off after 6 months or so, and means you won't need to repeat these steps for 12 or 18 months.:
1. Undo the little phillips head screw 2. Take the disc off 3. Do a 1/2 turn adjustment on the adjuster 4. Refit the disc - it should slide on easily 5. Repeat steps 2 to 4 until when trying to fit the disc, it's tight. When you get to this point, don't force the disc on - remove it 6. Back the adjuster off 1/2 turn. 7. Refit disc. 8. Refit screw 9. Repeat for other side 10. Test handbrake. Your handbrake should be nice and tight.
__________________
-----------------------------------------------------------------
The Hammer: FG GTE | 376rwkw | 1/4 mile 11.793 @ 119.75mph 1.733 60' (4408lb) 1 of 60 FG MK1 335 GTEs (1 of 118 FG Mk 1 & 2 335 GTEs). Mods: Tune, HSD/ShockWorks, black GT335 19 staggered replicas with 245 & 275/35/19 Michelin Pilot sport 5s Daily: BF2 Fairmont Ghia I6 ZF, machine face GT335 19 staggered Replicas with 245s and 275s, Bilsteins & Kings FPV 335 build stats: <click here> Ford Performance Club ACT |
||
|
|
|
|
28-05-2007, 05:52 PM
|
#3 | ||||
|
Back to Le Frenchy
Join Date: Feb 2005
Location: Back home.....
Posts: 13,346
|
Quote:
__________________
Quote:
07 Renault Sport Megane F1 Team R26 #1397
|
||||
|
|
|
|
28-05-2007, 07:44 PM
|
#4 | ||
|
Miami Pilot
Join Date: Jan 2005
Location: ACT
Posts: 21,703
|
$25 is not too bad. Those screws can be tight first time (takes you back a few years, doesn't it??) - I generally use a screwdriver drill bit, and use it in a 1/4" socket to undo it. That way you can press it in while undoing the screw.
__________________
-----------------------------------------------------------------
The Hammer: FG GTE | 376rwkw | 1/4 mile 11.793 @ 119.75mph 1.733 60' (4408lb) 1 of 60 FG MK1 335 GTEs (1 of 118 FG Mk 1 & 2 335 GTEs). Mods: Tune, HSD/ShockWorks, black GT335 19 staggered replicas with 245 & 275/35/19 Michelin Pilot sport 5s Daily: BF2 Fairmont Ghia I6 ZF, machine face GT335 19 staggered Replicas with 245s and 275s, Bilsteins & Kings FPV 335 build stats: <click here> Ford Performance Club ACT Last edited by JC; 28-05-2007 at 07:54 PM. |
||
|
|
|
|
28-05-2007, 08:17 PM
|
#5 | ||
|
FF.Com.Au Hardcore

Join Date: Aug 2005
Location: Fremantle W.A
Posts: 661
|
I had a bugger of a time too but managed to get done after a couple of attempts.
I had trouble seeing the adjuster as its on a awequid angle. I ended up taking the rotor off which was a mission in its self so I could see what was going on and which way to turn the adjuster, had to use a puller, loads of CRC and a few heavy taps with the hammer to get the rotor off the adjusted and measured the hadbrake shoes to get the right adjustment, I got the distance from the Ellory's manual. Hope it makes sence and it helps you out.
__________________
Losing my patients with unfinished threads  Did the ideas people helped you with work or not! 
|
||
|
|
|
|
28-05-2007, 08:38 PM
|
#6 | ||
|
Regular Member

Join Date: Jan 2005
Location: SMITHFIELD NSW
Posts: 472
|
Ill have to try that this weekend as mine aint grabbing much right now.
cheers guys
__________________
18 T6 Multivan 03 Ba Xr turbo 300rwkw |
||
|
|
|
|
28-05-2007, 08:54 PM
|
#7 | ||
|
All Bran = Regular Member
Join Date: Feb 2006
Location: BrizVegas
Posts: 1,970
|
You guys oughta invest in an impact driver for those tight phillips/slot heads.
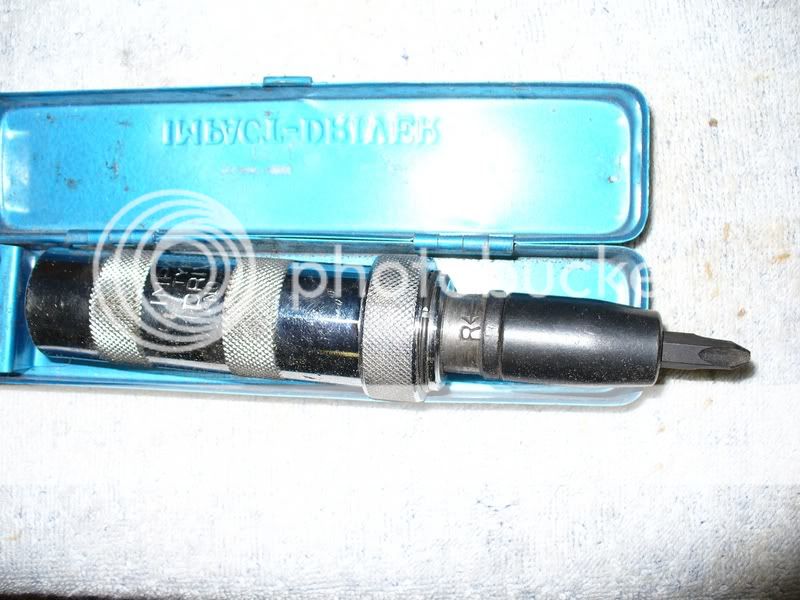 Had mine around 30 years and have used it many, many times. I can't recall ever being caught out since I've had it. From memory it was around $20 way back then so probably somewhere around $500 now, lol. edit: there ya go... the only one on ebay http://tinyurl.com/yphxnw |
||
|
|
|
|
28-05-2007, 09:55 PM
|
#8 | ||
|
FF.Com.Au Hardcore
Join Date: Aug 2005
Location: Fremantle W.A
Posts: 661
|
The screw was a piece of cake to undo it was the actual rotor that was a bugger as corrosion was bonding it to the hub. A puller, CRC and a fer moderate but firm taps with a ball peen hammer did the trick
__________________
Losing my patients with unfinished threads Did the ideas people helped you with work or not!
|
||
|
|
|
|
28-05-2007, 11:13 PM
|
#9 | |||
|
Miami Pilot
Join Date: Jan 2005
Location: ACT
Posts: 21,703
|
Quote:
__________________
-----------------------------------------------------------------
The Hammer: FG GTE | 376rwkw | 1/4 mile 11.793 @ 119.75mph 1.733 60' (4408lb) 1 of 60 FG MK1 335 GTEs (1 of 118 FG Mk 1 & 2 335 GTEs). Mods: Tune, HSD/ShockWorks, black GT335 19 staggered replicas with 245 & 275/35/19 Michelin Pilot sport 5s Daily: BF2 Fairmont Ghia I6 ZF, machine face GT335 19 staggered Replicas with 245s and 275s, Bilsteins & Kings FPV 335 build stats: <click here> Ford Performance Club ACT |
|||
|
|
|


 Linear Mode
